Scale Spandau Gun Kit Instructions
| Step 1 |
 Laminate
the three main body parts together. The part that doesn’t match
the others goes in the middle. Sand edges smooth so all the parts
match. Do not sand off the stub on the middle part. Laminate
the three main body parts together. The part that doesn’t match
the others goes in the middle. Sand edges smooth so all the parts
match. Do not sand off the stub on the middle part. |
| Step 2 |
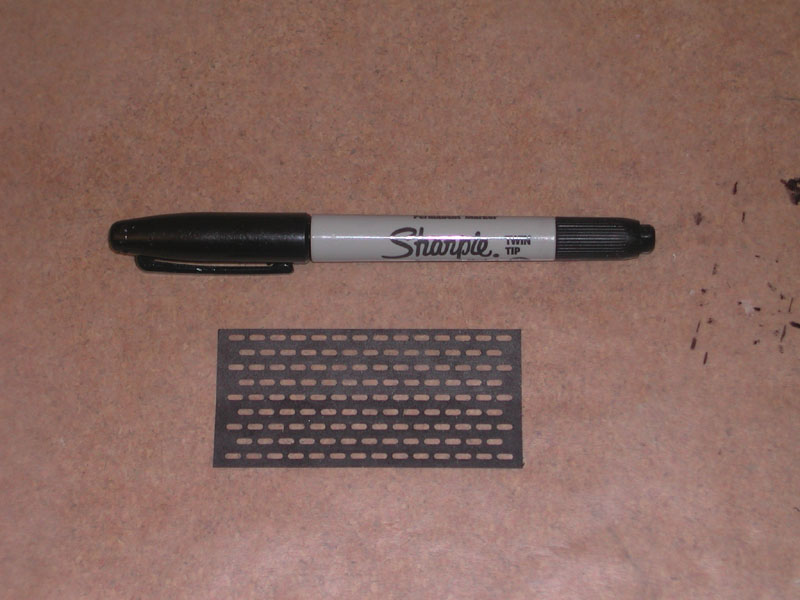  Spray
the cooling jacket sleeve with rubbing alcohol and curl around a round
object, being careful not to crease the card stock. Paint the inside
of the jacket the desired color prior to continuing. You may use a
permanent marker to save weight. Spray
the cooling jacket sleeve with rubbing alcohol and curl around a round
object, being careful not to crease the card stock. Paint the inside
of the jacket the desired color prior to continuing. You may use a
permanent marker to save weight. |
| Step 3 |
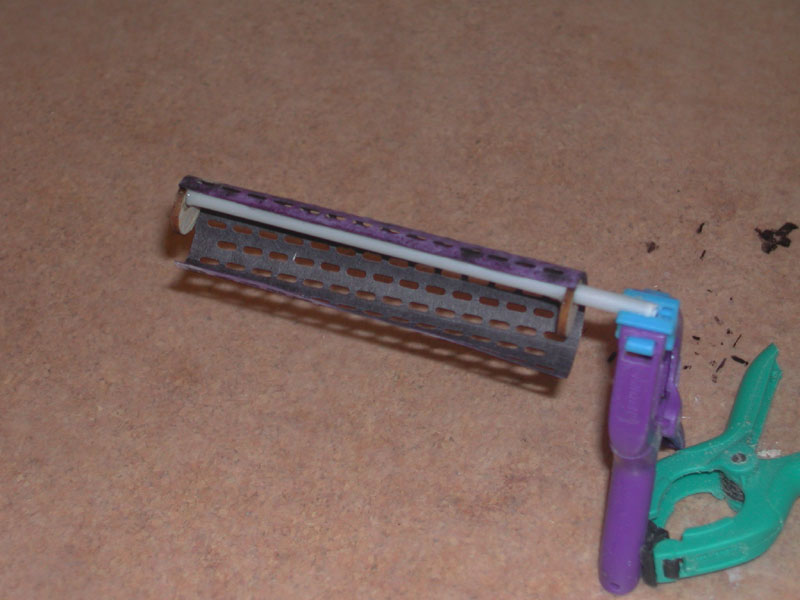
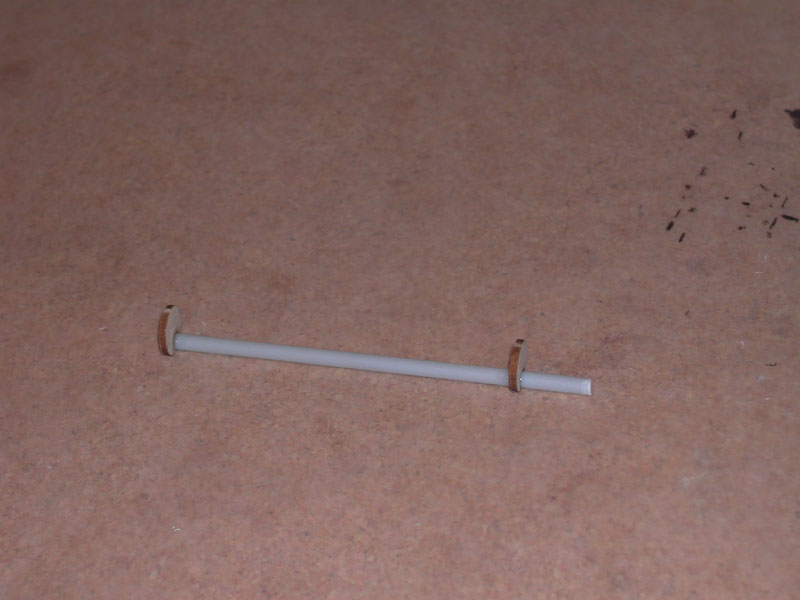 Glue
one of the cooling jacket ends to one end of the barrel. Glue the
other to the barrel so that when the cooling jacket is glued on, it
will match up exactly with the outside surfaces of the two ends. Paint
the inside of the ends and the barrel. Glue
one of the cooling jacket ends to one end of the barrel. Glue the
other to the barrel so that when the cooling jacket is glued on, it
will match up exactly with the outside surfaces of the two ends. Paint
the inside of the ends and the barrel. |
| Step 4 |
 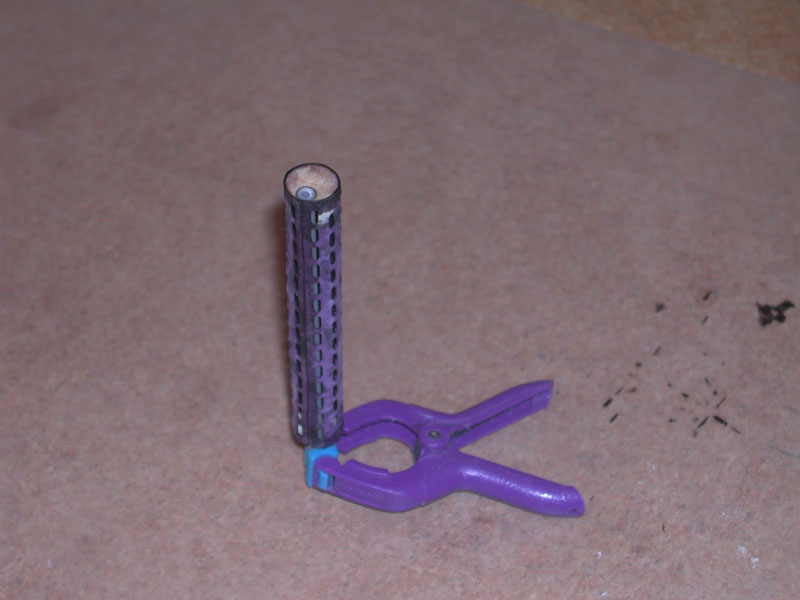 Glue
one long side of the cooling jacket sleeve to the barrel, then wrap
it around the ends and secure the other long side over the first with
thin CA glue. Glue
one long side of the cooling jacket sleeve to the barrel, then wrap
it around the ends and secure the other long side over the first with
thin CA glue. |
| Step 5 |
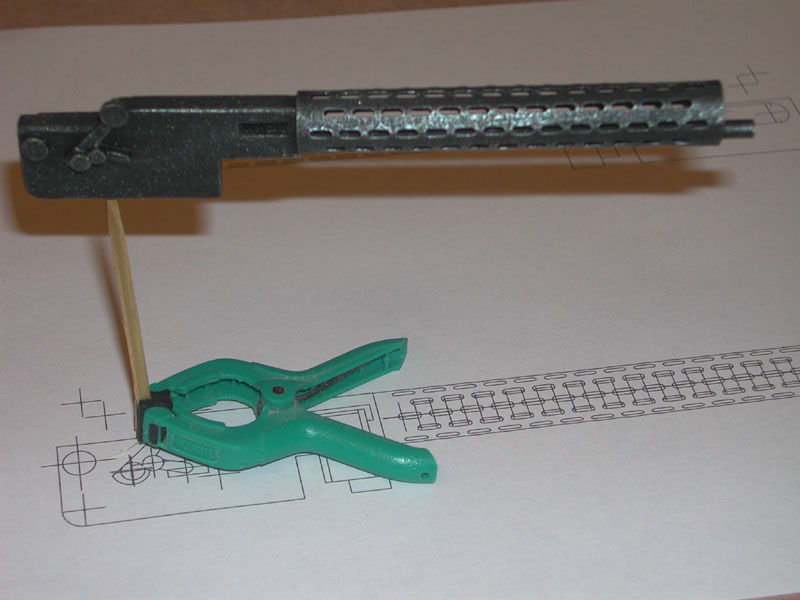
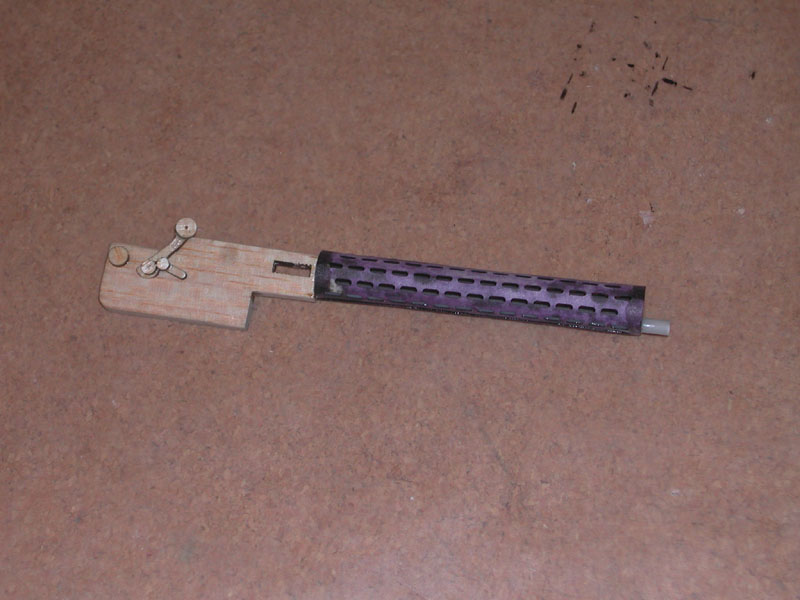 Attach
the cooling jacket assembly to the main body. The barrel should fit
over the stub on the middle part of the main body. This will help
you align the two assemblies. Attach
the cooling jacket assembly to the main body. The barrel should fit
over the stub on the middle part of the main body. This will help
you align the two assemblies. |
| Step 6 |
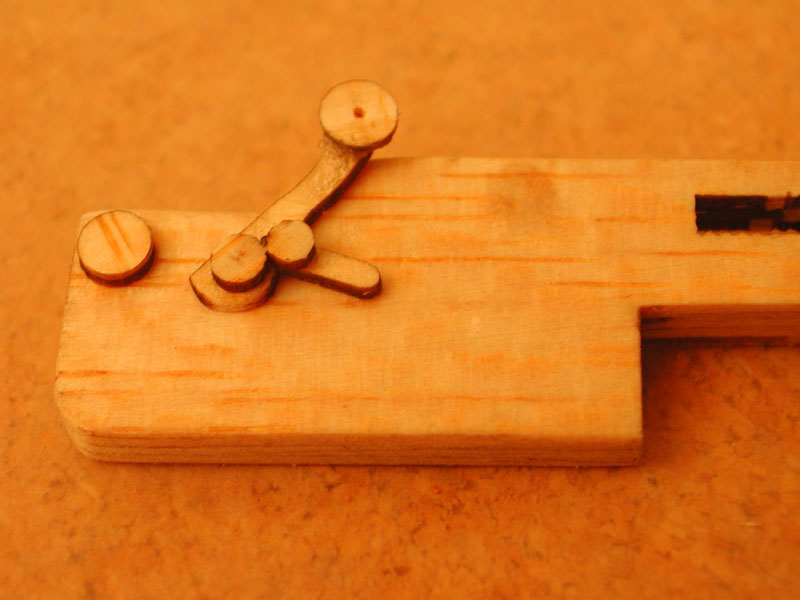 Apply
the detail parts as shown in the diagram on the kit packaging. Apply
the detail parts as shown in the diagram on the kit packaging. |
| Step 7 |
|